

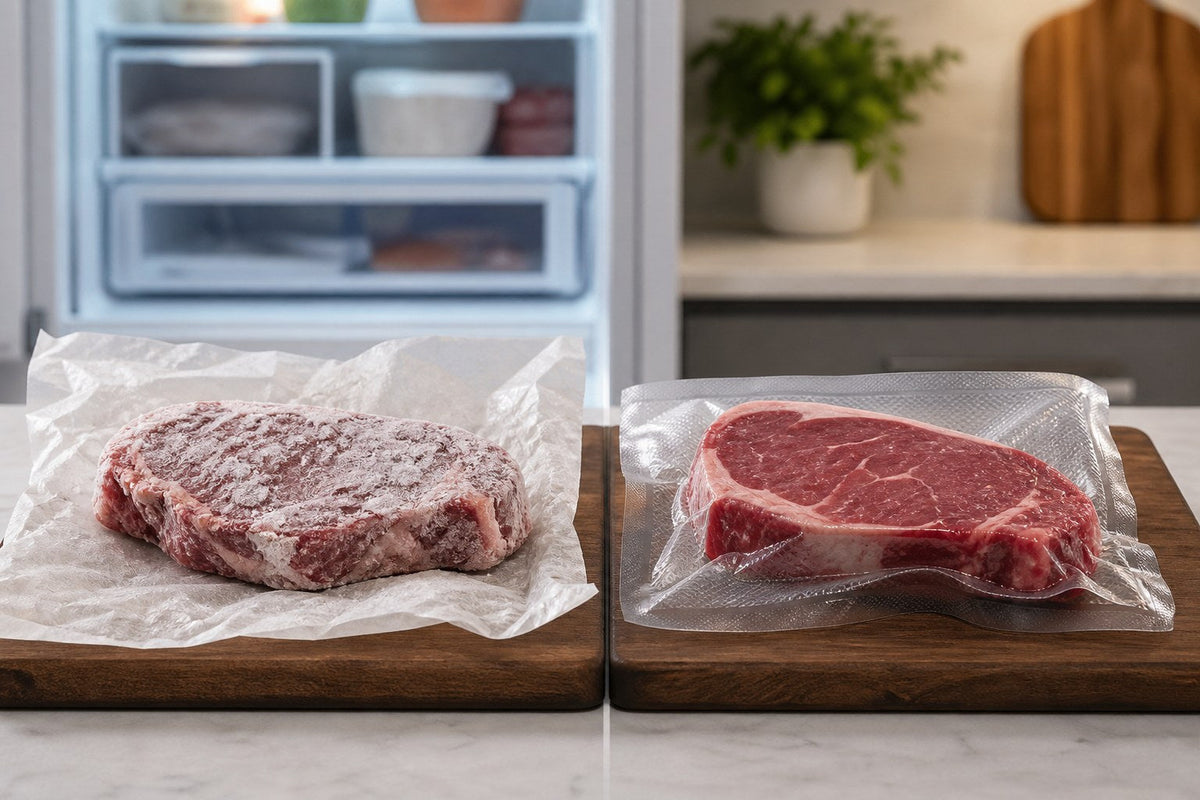
Quick answer: To prevent freezer burn, protect food with close-fitting freezer packaging, remove excess air, and check the seal. Freeze manageable portions promptly, keep the freezer at 0°F (-18°C) or below, and label packages for rotation. Vacuum sealing helps limit air exposure, but it cannot correct an unsafe cooling routine or a damaged bag.
A freezer should make dinner easier, not leave you trimming dry edges from a steak you meant to save. The useful question is not which gadget promises the longest storage time. It is where your routine lets air, moisture loss, or forgotten packages become a problem.
This guide focuses on prevention. For identifying an existing patch, see what freezer burn looks like and how it affects food. Keep that distinction in mind: preventing quality loss and deciding whether food was handled safely are related but separate jobs.
Hero image: Illustrative comparison, not a controlled storage test. Packaging condition matters more than a promised storage multiplier.
Why freezer burn happens: match the cause to the fix
Freezer burn is drying on the food's surface. Packaging that limits exposure to freezer air helps protect quality. USDA packaging guidance recommends food-grade, freezer-weight materials and overwrapping thin supermarket packs for longer storage.
| What to check | Why it matters | Practical correction |
|---|---|---|
| Air pockets beside food | Exposed surfaces can dry out | Use a closer-fitting package and remove excess air |
| Wrinkles, crumbs, grease, or juice at the seal | A compromised seal may let air back in | Start again with a clean, flat sealing area |
| Thin store wrapping | It may be too permeable for extended freezer storage | Overwrap with suitable freezer material or repackage |
| Large stacks of newly packed food | The centers can freeze more slowly | Arrange a single layer first; stack after freezing |
| Uncertain freezer temperature | The dial alone does not confirm actual conditions | Use an appliance thermometer |
| Undated or oversized portions | Food is easier to overlook or repeatedly reopen | Date packages and portion for one planned use |
How to prevent freezer burn: a five-step checklist
1. Prepare food while it is still in good condition
Decide what belongs in the freezer before it becomes the last thing in the refrigerator. Divide a family-size pack into the portions you actually cook. Two flat portions are often more convenient than one thick block that must be opened for a smaller meal.
Handle cooked leftovers separately from raw food. Divide leftovers into shallow containers and refrigerate promptly; do not wait for a large pot to cool on the counter. Perishable food needs refrigeration within two hours, or one hour when the surrounding temperature exceeds 90°F. These are safety limits, not a target cooling time. See FoodSafety.gov's clean, separate, cook, and chill guidance.
2. Choose packaging for the food, not just the available space
Use freezer-rated bags, wraps, or containers. A bag should fit the food while leaving the clean loading and sealing space specified by the machine's instructions. A container should suit the portion, but liquids also need the manufacturer's expansion allowance. Do not remove necessary headspace just to eliminate every air pocket.
Precut bags suit repeat portions; rolls let you size a bag around an unusual shape. The vacuum sealer bag size guide helps with that choice. Keep food and package compatibility separate from price: a bargain bag is not useful if it cannot make a dependable seal with your machine.
3. Remove air and inspect the entire seal
Fold the bag rim outward while loading so food does not smear the area that must seal. Unfold it, check for contamination, and align the opening as directed. After sealing, look across the full line for folds, gaps, or food residue. A bag that initially looks tight still needs an intact seal.
For a household external-suction sealer, freeze free-flowing soup or sauce solid before bagging unless the specific machine expressly supports another method. A moist-food setting is not permission to pull liquid into the machine. Follow its cleaning and rest-cycle instructions if fluid reaches the collection area.
If a first seal is defective, correct the cause and reseal according to the manual; adding another line over a wet or wrinkled area is not a reliable repair. Protect exposed sharp edges only with a food-contact barrier approved for the intended use. Do not improvise with an unidentified plastic scrap.
4. Freeze promptly, in a single layer
Maintain 0°F (-18°C) or below and leave room around newly added packages. Once they are solid, stack them to recover space. A flat bag also makes it easier to identify and retrieve one meal without excavating everything underneath. These practices follow the rapid-freezing and temperature advice in USDA's freezing guide.
Check temperature trends rather than blaming one brief door opening. A temperature fluctuation does not automatically mean food thawed. If a door was left open or power failed, assess the actual food temperatures and duration separately from visible frost.
5. Label, rotate, and check the package
Write the food name, portion, and freezing date where you can read them without opening the package. Add “raw” or “cooked” when the contents are not obvious. Move older packages forward when you add new ones, and keep a short inventory on the freezer door.
If a package loses its tight fit, inspect it before assuming the food is ruined. Repackage food that remained safely frozen, but investigate any uncertain thawing history first. Use the vacuum-sealed meat storage guide for food-specific conditions; a new seal does not reset the food's storage history.

Does vacuum sealing prevent freezer burn?
Vacuum sealing can help reduce freezer-burn risk by removing much of the surrounding air before a package is closed. It is one part of the system, alongside freezer-suitable material, a sound seal, and cold storage. It does not sterilize food or guarantee a particular number of extra months.
The FRESKO New V8 vacuum sealer lists automatic moisture detection, a bag-mouth clamp, and a removable drip tray. Those features support loading and cleanup; they do not replace the checks above. Choose compatible vacuum sealer bags and follow the instructions for your exact model.
If freezer burn keeps coming back
Change one part of the routine at a time. Damage near an opening is a reason to inspect loading and seal quality. Damage across many different packages is a reason to check packaging materials, freezer temperature, and storage time. These are troubleshooting clues, not proof of one cause.
- Myth: every ice crystal is freezer burn. Frost can form without obvious surface drying.
- Myth: colder settings repair poor packaging. Cold storage does not close a pinhole.
- Myth: vacuum sealing makes food shelf-stable. Perishable food still requires proper refrigeration or freezing.
Common questions
Can you stop freezer burn once it starts?
You can improve packaging to limit further exposure, but you cannot restore the original texture of an already dried patch. Decide safety from handling history first, then quality from the condition of the food.
Does foil prevent freezer burn?
USDA includes heavy-duty foil among suitable freezer packaging options. Wrap carefully and protect against tears; no material has a universal, guaranteed freezer-burn-free timeline.
Is freezer-burned food automatically unsafe?
No. Freezer burn itself is a quality defect, but it cannot tell you whether food was cooled, thawed, or stored safely. When handling history is uncertain, use USDA emergency food-safety guidance; never taste food to test safety.
The takeaway: prepare, portion, protect, seal, and rotate. A repeatable routine is more useful than a promise that one bag or machine will prevent every problem.
Share:
How to Clean an Immersion Blender: Blade Guard, Attachments, and Storage
How Long Does Vacuum-Sealed Meat Last? Storage Conditions Explained